Showing posts with label Recipe. Show all posts

1 May 2020

Bottling summer with homemade elderflower cordial

There's a massive elder tree next to the salad garden cul-de-sac, whose branches droop invitingly over the fence towards me.  Those branches are covered in umbels of flowers about to open so, naturally, I'm about to retrieve and wash my cordial bottles, ready to replenish my stocks of delicious home made elderflower cordial.


I've borrowed from my previous posts (2019 and 2015) about making elderflower cordial to keep things simple because, well, what more is there to say?  Except, maybe, elderflower fritters which I haven't tried but have heard are very good.

My recipe below is an easy one that I've found works well. I keep this to hand as I got very confused when I first tried to make elderflower cordial. Mine is an adaptation of several that I've used and tweaked year on year. (Originally I used limes, following Sarah Raven's recipe; it was not a happy outcome.)

Also, the sugar - it's a lot, but very necessary to extract the essence of the flowers and fruit. A couple of years ago I'd become concerned about the amount of sugar needed for the recipe so didn't make any cordial. It was a decision I came to regret during the extreme heat of the summer - a glass of iced water sweetened with a slug of citrus infused cordial hits the spot nicely on a hot day. So I now (try to) think of this cordial as a treat.  It's also very good added to an iced gin+tonic, and delicious in cake. (Note to me: I must look out those recipes.)


So, onto the recipe. It is, after all, why you're here.  But first, a few tips.

Tip one: Most recipes will include citric acid as a preservative - I don't bother. As I found it hard to get hold of at first, I now keep one bottle of cordial in the fridge and freeze the rest in small washed plastic bottles saved from the smoothies I buy when out. I think that the addition of citric acid may alter the flavour and the cordial might not taste as nice. Also, thanks to the sugar content, the cordial freezes really well; I've defrosted cordial after a year with perfect results.

Tip Two: Look carefully for aphids before you pick the flowers. I found some stems covered in the sort of black aphids usually found on broad beans and left those blooms well alone. Even so, when I got home, I made sure to gently shake the blooms over the sink to dislodge any other critters. (A few black aphids, greenfly and a couple of small spiders, thanks.) Having done that, I then held the blooms over a white tea towel for a second look; it was needed.

Tip Three: There may be some tempting plate sized blooms below knee level just begging to be picked. Don't. Wherever you live, there will be creatures that wee. In my case, dogs and foxes. (I hope that's all but let's not go there.) My advice is to pick the blooms that you have to stretch up high for, just to be on the safe side.

Tip Four: Make sure that you're picking the right flowers. Always important when foraging for any edibles but here the unmistakeable smell of elderflowers should ensure you pick wisely. If in doubt, here's some visual help.

Collage of 3 elderflowers and one that isn't!
Spot the difference! Bottom right is NOT elderflower - look at the leaves!

So now all we need is for the sunshine to return ... !


My simple but trusted recipe for Elderflower Cordial


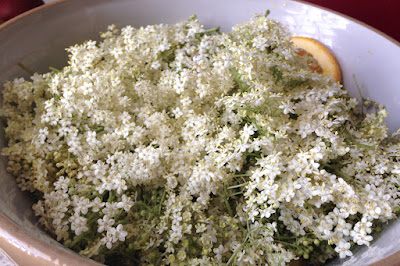
Large bowl filled with elderflower heads and citrus fruit


3 unwaxed lemons
1 or 2 oranges
1 kg (2.2 lbs) granulated sugar (in the US: ordinary sugar not powdered sugar)
15-20 medium to large elderflower heads
1.5 litres tap water (50 US fluid ounces)

First stage:
In a large pot on the stove, make a sugar syrup by slowly dissolving the sugar in the water over a gently heat. Stir occasionally and once dissolved (no more sugar grains to be seen), bring the syrup to the boil for about 5 minutes.
While that's doing, peel the oranges and lemons. The white pith is bitter so try to leave that on the fruit. (Or just slice the fruit in ½ cm chunks.)
Cut the big stems off the cleaned/shaken elderflowers and put the flowers in a large pot or saucepan with the citrus peel.
Pour the hot syrup over when it's ready. Put a lid on the pan and leave to infuse for 24 - 36 hours. (The timing is very forgiving; life is unpredictable.)

Next day/stage:
Sterilise bottles or jars ready to decant the mixture into. Giving plastic bottles a good hot wash will suffice if they're going into the freezer. Glass bottles can be washed and then dried on a low temperature in the oven for 10 minutes. As a time saver before now, I've washed and then microwaved glass jars to sterilise (but not the metal lids - please!) Lids should be boiled in a pan of water for a few minutes.
Sieve the infused cordial through a muslin cloth or tea towel, placed in a sieve over a bowl or large jug. I now use a jelly bag held securely in it's frame, so much easier! (Here, for info.)
Pour the cordial into the bottles, and store as appropriate.

... Or drink straightaway!  And enjoy!

27 Oct 2019

What to do with quince? How about spiced?


From the moment I discovered the edible fruits of flowering quince (Chaenomeles japonica), I desperately wanted to try the perfumed real thing - the fruits of the quince tree Cydonia oblonga - without any idea of what to do with them. As ever, I've found out by doing it.

Seasonal recipe - Swedish Pickled Beetroot

freshly harvested home grown beetroot held above a raised bed of parsley
~ the first beetroot I grew ~ 

So there I was, glancing through the titles on the bookshelves of the new family I was babysitting for when I spotted an intriguing title. 'Swedish Bakes'.  Who doesn't love a cinnamon bun? I prised it off the shelf and settled down for a good read.

There were many very, very tempting recipes to be found but the one that really spoke to me (not literally, that would be too weird) was not a bake but a pickle.  For beetroot.

19 May 2019

I love the smell of elderflowers in the morning

... particularly when that smell indicates elderflower cordial being made for summer!

It's easy to lose track of how quickly the seasons advance at this time of year.  May has been typically unsettled weather-wise so I was delighted to see elderflowers starting to open as I walked home a fortnight ago.  Luckily, I walked that route again last Thursday and saw that there are now enough blooms to make elderflower cordial.

I've written about making elderflower cordial before - and how to correctly identify the right tree to pick from - so this post is by way of a reminder for anyone who wants to make delicious cordial before the blooms fade ... unless you have your heart set on elderberries for wine!


It was a stroke of luck seeing those elderflowers as I usually walk far and wide over Hampstead Heath in search of them.  My favoured patch was felled during repairs to the Heath ponds a couple of years ago and then last year I recall being concerned about the amount of sugar needed for the recipe so didn't make any.

It was a decision I came to regret during the extreme heat of the summer - a glass of iced water sweetened with a slug of citrus infused cordial hits the spot nicely on a hot day. So this weekend I bought sugar, dug out my recipe and went out this morning with my trusty secateurs to collect the bounty.


I've included my recipe below as I think it's an easy one and got very confused when I first tried to make elderflower cordial. Mine is an adaptation of several that I've used and tweaked year on year. (I now never use lime.) But first, a few tips.

Tip one:  Most recipes will include citric acid as a preservative - I don't bother.  As I found it hard to get hold of at first, I now keep one bottle of cordial in the fridge and freeze the rest in small plastic bottles saved from the smoothies I buy when out. I think that the addition of citric acid may alter the flavour and the cordial might not taste as nice.

Tip Two: Look carefully for aphids before you pick the flowers.  I found some stems covered in the sort of black aphids usually found on broad beans and left those blooms well alone.  Even so, when I got home, I made sure to gently shake the blooms over the sink to dislodge any other critters.  (A few black aphids, greenfly and a couple of small spiders, thanks.)  Having done that, I then held the blooms over a white tea towel for a second look; it was needed.

Tip Three:  There may be some tempting plate sized blooms below knee level just begging to be picked. Don't.  Wherever you live, there will be creatures that wee. In my case, dogs and foxes.  (I hope that's all but let's not go there.)  My advice is to pick the blooms that you have to stretch up high for, just to be on the safe side.

My simple but trusted recipe for Elderflower Cordial


3 unwaxed lemons
1 or 2 oranges
1 kg (2.2 lbs) granulated sugar
15-20 medium to large elderflower heads
1.5 litres tap water (50 US fluid ounces)

First stage:
  1. In a large pot on the stove, make a sugar syrup by slowly dissolving the sugar in the water over a gently heat.  Stir occasionally and once dissolved (no more sugar grains to be seen), bring the syrup to the boil for about 5 minutes.
  2. While that's doing, peel or finely grate the oranges and lemons. The white pith is bitter so try to leave that on the fruit.  (I have a julienne peeler which does the job perfectly. Link here to show what it is, I'm not an Amazon affiliate.) 
  3. Cut the big stems off the cleaned/shaken elderflowers and put the flowers in a large pot or saucepan with the citrus peel.
  4. Pour the hot syrup over when it's ready.  Put a lid on the pan and leave to infuse for 24 - 36 hours.
Next day/stage:
  1. Sterilise bottles or jars ready to decant the mixture into. Giving plastic bottles a good hot wash will suffice if they're going into the freezer. Glass bottles can be washed and then dried on a low temperature in the oven for 10 minutes.  As a time saver before now, I've washed and then microwaved glass jars to sterilise (but not the metal lids - please!)  Lids should be boiled in a pan of water for a few minutes.
  2. Sieve the infused cordial through a muslin cloth or tea towel, placed in a sieve over a bowl or large jug. I now use a jelly bag held securely in it's frame, so much easier! (Here, for info.)
  3. Pour the cordial into the bottles, and store as appropriate.  
... Or drink straightaway!


21 Nov 2018

Focus on: Celeriac. The benefits, the recipes, and how to grow

Celeriac is a health giving root vegetable that can be easily put back on the menu. I've been diving into the cookbooks and have come up with several very tasty recipes to make the most of its health benefits.


Autumn is definitely upon us (despite the occasional chill sunny day) and with it the desire for soups and heartier warming food. Science says that with less daylight hours, our brains direct us towards eating more substantially to produce the happiness hormone serotonin.

I found celeriac for sale recently and was reminded of the delicious remoulade I'd eaten last summer at the Raymond Blanc Gardening School where all lunch ingredients are grown in the kitchen garden. At that time, I'd never tasted celeriac before but enjoyed the blended taste of celery, mustard, mayo and crème fraiche, the main ingredients in remoulade.  I didn't think to look for celeriac afterwards but, seeing a pile of these root vegetables in the shops, I bought one with the intention of exploring whether I should be growing this vegetable next year.

Why grow your own

Putting aside that this supermarket wraps its root vegetables in plastic - (why? when they have to be peeled anyway?) - any veg that's home grown is going to be fresher, organic (I never use pesticides), and seasonal.  I often conjure up meals inspired by what I can gather from the garden and anything freshly picked at this time of year is a welcome bonus.

Having very little growing space, I have to make sure that whatever I plant will be a good return for my time investment, ie, be tasty, hard to source in the shops, and cheaper to grow myself. And packed with nutrients.

The nutritional benefits:

Celeriac is from the same plant family as celery so has a similar taste but is the bulbous root rather than the stem. I was amazed to discover that as well as being a good source of carbohydrate, the root has many health benefits to offer. So big tick in the box for that.
  • Useful minerals - phosphorus for healthy bones; potassium for detoxing cells, healthy nerve function (keep those stress levels down!), efficient muscle contraction and regulating the heartbeat; manganese for development and good metabolism.
  • Useful vitamins: Celeriac is known to be an excellent source of Vitamin C which means that it's also anti-oxidant and anti-cancerous.
  • Vitamin K; good for bone and brain health. Vitamin K improves the body's ability to absorb calcium and who wouldn't want good strong bones to counteract osteoporosis in later life? It's worth noting that 1 cup of celeriac contains 80% of recommended daily intake of vitamin K. More importantly, Vitamin K is fundamental in protecting the nerve endings in our brains which might limit the damage caused by Alzheimer's.  I find that a reassuring thought.
  • Low in calories; only 42 cals per 100 grams - useful as part of a weight loss regime. I found that Slimming World have a few recipes using celeriac, including a delicious sounding gratin.
Whew! Not bad for a lumpy root vegetable. I'm beginning to like it a lot.

In the kitchen:

Life can be so crazy busy that it's important for me to know that I'm not giving my family empty calories when I serve up dinner.  Having a notebook of quick recipes gives me an alternative to microwave ready meals when time is short and ensures that meals are nutritious. Would celeriac be a good fit for my notebook? After a bit of research, it appears the answer is yes.

Am I the only person to be unaware of this workhorse winter vegetable?  It's beginning to appear so. Celeriac is crisp when raw but is silky smooth when puréed. It can be roasted, sautéed, baked, grated, mashed, pickled or blitzed into soup. You can't do all that with a potato.

Online I found that it seems to be a favourite with the celebrity chefs:
Ultimately, I made a soup with my celeriac, following a recipe in Anna Jones' book 'A Modern Way to Eat'. One ingredient was butter beans to give the soup a creamy texture.  It was nice. But that's hardly the hearty recommendation, is it!  For me, the soup was too thick but the flavour was good, especially topped with chopped toasted hazelnuts, a trick that I've adopted with my favourite cauliflower soup. Next time, I'll add more milk to the recipe, or make Mark Hix's celeriac and apple soup.

Growing celeriac:

At the start of writing this post, I was sceptical of growing celeriac for myself.  As with leeks and onions, with one seed you get one root so it's not exactly a space saving veg for the small garden, especially if they can be found locally in the shops.  But now I'd say to give it a go; celeriac is obviously a versatile ingredient and will provide fresh vegetables at the onset of winter. 

  • The seeds need to be started around March, sown onto good seed compost and left uncovered as they need light to germinate. Keep at an even temperature between 15°-18°C (60°-65°F) as they don't like extreme cold.
  • Prick out the seedlings into modules as soon as they're big enough to handle to minimise root disturbance. By pricking out at an early stage, this should stop them bolting later on. Grow on under cover or indoors until they're about 10cm (4 inches) tall.   
  • Plant out after danger of frost has passed but grow under mesh or horticultural fleece to thwart celery leaf miner attacking the young plants. Some sort of slug prevention would also be useful; I use Strulch.  If planting in the square foot method, put only one plant into one square, or nine to a square metre bed.  Celeriac prefers humus rich, well manured soil - the no dig method is perfect for this.  Keep the soil moist in a dry summer by watering well as celeriac is shallow rooted and won't bulk up if it dries out.   
  • As the celeriac grows, remove the outer leaves to expose the crown of the bulb and encourage it to develop. Harvest is usually from October onwards; grower's choice whether to dig up when needed, leaving the remaining bulbs in the ground - or, if there's a slug problem, harvesting all at the same time and storing in boxes in a cool place.

Adding to the planting plan:

In conclusion, I'd say celeriac will be a useful addition to the autumn veg patch and I'll be sourcing seeds for next year but limit the amount I grow.

If I close my eyes, I can picture that tray of roasted celeriac with coriander seeds (recipe above) being brought to the Christmas table alongside sprouts with bacon, maple glazed carrots and a fragrant herb stuffed bird. Sounds delicious? Particularly when most of that produce is home grown!


This comment left via email from Christine Bryant, after reading this article:
I have just read your blog about celeriac, one of my favourite vegetables.  It's also good raw.  Slice thinly and add to a crunchy winter slaw or cut into small batons.The seedlings are tiny when they germinate.  I work as a volunteer gardener in the kitchen garden at a large house and was asked one day to transplant celeriac seedlings.  I could hardly see them!  But they went on to produce the vegetable we all know and love. It needs plenty of water to grow to a good size.


If you've enjoyed reading this post, please ...
• add it to your Pinterest board
• follow me on Instagram


16 Oct 2018

A Harvest of Quince and The Best Recipe for Quince Jelly. Now where's my runcible spoon?

I'm feeling rather pleased with myself and slightly uneasy at the same time. Why, you may ask. Let me tell you.


Having wanted to grow proper quinces for several years, this year my tree has produced the goods. I counted 40 this year, a thrilling effort from this four year old tree. To have forty quinces gives plenty of scope for trying out new ways of cooking and preserving. But if there's this many this year, what of the future?  I've read of massive gluts and that's when I start to get jittery. Forty I can cope with; eighty or more might start to feel like overwhelm. Do we really know what we want to do with a wealth of quinces? It's one of those 'Be careful what you wish for' moments.

My desire for a quince tree started in 2012 when I noticed the round fruits of Chaenomeles x superba growing in the gardens at Capel Manor where I was studying. I was told that they were edible, like quince. Seems reasonable as the plant's common name is Japanese Quince. I snaffled a few from the ground and made membrillo.  It was jolly good.

I also used some to make a tea infusion.  I'd heard that Lithuanians traditionally steep slices of raw quince in hot water and honey to make a soothing winter drink. Apparently the fruit is a good source of vitamin C, as well as copper, magnesium and other very useful minerals. I made some with Japanese Quince and was singularly unimpressed; it didn't taste of much.  Obviously I needed proper quinces for this.  (Perhaps I should try again with one of this season's Cydonia quinces.)

So why bother with Cydonia (real) quince when you can use Chaenomeles? Both have an aroma, although quince will perfume an entire room, and both have fruit that goes pink when cooked.  I remember Japanese Quince (Chaenomeles) being quite sharp flavoured, a bit like having lemon in tea so I'm going to guess that Cydonia quinces are slightly sweeter, possibly with more depth of flavour. (Or maybe it's the other way round? Foraging might be in order when the rain stops. If anyone reading this knows, please tell!)

I'm having a bit of fun trying out various ways of using my quinces.  After a weekend of rain, several of the fruit had split so were quickly picked and turned into a quince crumble using a Nigel Slater recipe from his fruit book 'Tender, vol II'.  It was nice, in fact the topping was delicious, but it's not a patch on plum crumble!

(The online link to the Slater recipe is here; make a note of the topping ingredients and enjoy Nigel's writing!)

After that, I was rooted in indecision for a while - there's more choice than just membrillo - but rediscovered this recipe for Old Fashioned Quince Jelly in my National Trust Preserves book. I had more split quinces that needed to be used quickly before they went brown and this recipe is one you just get on with. No peeling, coring or boring stuff. Just chop the quinces up, chuck into a pan, cover with water, cook, strain overnight, add sugar to the juice and boil.

The result is a beautiful clear jelly, sweet with a definite quince taste and scent. I had a enough left over for another half jar so have tried it out today on bread and butter; it's delicious. I like that its recommended uses are either for savoury (to go with lamb, cold meats, cheese, etc, like a redcurrant jelly) or topped with cream in a cake or, even better, spread on toasted muffins or scones! Now you're talking. Here's the finished result - four (and a half) little jars of deliciousness.  Now where's my runcible spoon?

And I still have a bowl of quinces in the kitchen ... possibly for pickling.


Old Fashioned Quince Jelly

1.35kg (3lb) ripe quinces
Water to cover
Thinly pared rind and juice of 1 large lemon (unwaxed)
Granulated sugar

Wash the quinces, rub off any down. Don't peel or core them but chop roughly into a large pan and just cover with water. Add the lemon rind then simmer gently until the fruit is soft and pulpy (about an hour). Stir in the lemon juice and strain through a jelly bag overnight.

Next day, measure the juice and pour into a clean pan. Add warmed sugar (I put mine in the oven at 140°C for 10 minutes) allowing 450g to each 600ml juice. (I had 900ml juice so used 675g sugar - and, yes, I did very gently squeeze the jelly bag to get the last of the juice from the pulp.)

Heat gently, stirring to completely dissolve the sugar, then bring to boil and boil rapidly until setting point is reached. 104°C if you have a sugar thermometer, or wrinkly spoonful on a cold plate if not.

Skim, then pot into hot/warm clean, sterilised jars, cover and seal.  (I washed my jars, rinsed well and dried them in the oven after the sugar was warmed.)


17 Sept 2018

Garden gathered soup: Raymond Blanc recipe

Bowl of chunky vegetable soup


My son was feeling a bit peaky at the weekend so I made soup.  Not that I don't make soup at other times, it's just that soup with nutritious ingredients freshly gathered from the veg patch seems to be the perfect cure for autumn chills. (Of course the minute I typed those two words, the sun came out and it was really hot outdoors!)  I'm a big believer in the preventative power of good fresh food. (Beetroot seems to knock back the first signs of a cold for me. Works every time.)

It's a nurturing instinct isn't it, to provide good food to boost the immune system against seasonal change. My mum thought so, as did the mother of chef Raymond Blanc.  The influence of his mother's cooking, based on ingredients grown in the family garden, is well documented.  I was lucky enough to sample the soup inspired by 'Maman Blanc' when I attended a workshop at the RB Gardening School a few weeks ago. Admittedly, on that occasion it was made in a two Michelin star kitchen but it was so delicious that to say it was clean and fresh yet with complex flavours doesn't do it justice. For me, it captures the connection between the garden and kitchen and proves the reason I grow fruit, veg and herbs.

12 Jul 2018

Five kilos of cherries


July is the month of soft fruit and I absolutely adore the sight of ripe red cherries hanging from the trees in my garden - even knowing that the cherries in question are not sweet cherries. At the time the garden was repurposed for food growing, our group chose sour rather than sweet cherries. I'm not altogether sure that we knew what we were doing; I expect someone recognised the name Morello, perhaps from a delicious jar of store bought jam, and thought that was the cultivar to go for.  As it happens, it was a good decision in terms of location (Morellos don't mind a bit of shade) with the bonus that birds leave the fruit alone ... on the whole.


30 Dec 2017

Easy risotto with garden grown Squash(kin)


~ Squashkin, butternut and Old Boer White pumpkin ~

Let me tell you about one of the loveliest and tastiest squashes that I grew this year. I'm never without a butternut squash lurking somewhere in my kitchen so wanted to grow my own this year.  But how much better to grow a squash in the shape of a pumpkin! My eyes lit up when I saw seeds of a new hybrid called 'Squashkin' in the Marshall's catalogue last year and I promptly ordered some. But first, another tale.

I was never the child that tore into Easter eggs or birthday presents, instead I teased out the moment, savouring every tuck in the paper or release of tape, trying desperately to avoid a glimpse of what was inside. I could leave my Easter eggs in their cellophane for weeks and know it annoyed my siblings no end that I still had chocolate long after theirs had been eaten. It was my way of eking out the anticipation and choosing the right moment to indulge. Until, that is, a particularly beautiful Easter chocolate sculpture of birds in a nest with their speckled eggs was left too long in the sun and melted. Dismay, disappointment and regret ensued.


Why mention this now? Well, I've been at it again, prolonging the moment to cook the squashes and pumpkins that I grew this year. Harvested in late October, they've sat in my kitchen ever since, where I can admire their rustic beauty. (Does anyone else feel like that about their pumpkins? I'd grow them for looks alone!) I searched through my cook books for inspiration, something delicious that both my son and I would enjoy. I wasn't sure that he'd be too interested in roasted veg, while soup didn't seem to do this beautiful vegetable justice. (Although I've since found a promising recipe in an old Delia book, rescued from my mum's kitchen last year.)


Finally, yesterday, it was time. After all the cooking and eating of indulgent Christmas fare, I wanted to cook something quick, easy and soothing. Risotto ... with the Squashkin. Way back in spring, I'd been tempted by descriptions of this squash being a hybrid with the thin skin and keeping qualities of a butternut and the superior aromatic flavours of a Crown Prince. So I anticpated that the skin would be easy to slice.  It was - as easy, if not easier than a butternut whose skin had hardened on a supermarket shelf. I also hoped that the flesh had ripened enough. Apparently, yes. (It wasn't a huge pumpkin and took ages to appear - in 2018 I'm sowing earlier.) A check round the kitchen gave me onions, garlic, chorizo, herbs and stock. Dinner was served half an hour later with some butter-fried chestnut mushrooms. (Peas and greens added after photo. Oops.)
😋


I always make extra for leftovers lunch the next day. This was so good that the pot was scraped clean for second helpings. Risotto is so easy to make that I feel silly offering this as a recipe - consider it more as inspiration. Sometimes I use leeks or shallots rather than onions, or stir blue cheese rather than parmesan through at the end, or no cheese at all, or perhaps some chicken leftover from a roast with sliced red bell peppers or a sprinkle of chilli flakes. A risotto of frozen peas and parmesan is perfect for small children - although squash added to that makes it very pretty and just as popular. I just love that the base dish is so adaptable. And there's no need for all that stirring and waiting, although that in itself can be very soothing.  My son, being a student with no time for faffing in the kitchen, taught me to throw everything in after sweating off the onions. He puts his in a big Le Creuset pot, gives it a good stir, pops the lid on and leaves it in a medium oven for 40 minutes. It tastes just the same.

The real reason for writing this post is to suggest Squashkin as a good vegetable to grow next year if you have the space. (Allow one square metre per plant.) The flavour was really good - and definitely superior to supermarket butternut squash and big orange pumpkins. Cooked in the stock with the rice, the chunks of squash softened and absorbed the other flavours and the end result was utterly delicious.  Job done!


(Recipe provided for anyone that has never made risotto.)

Easy Squash and Chorizo Risotto for 2-3 people

140g arborio rice
700ml hot stock (I use half home-made chicken stock, half Marigold bouillon)
1 medium onion, chopped finely
2 large garlic cloves, sliced very thinly
Half a large squash, about 600g before peeling
1 teaspoon of dried herbs (or fresh finely chopped thyme/rosemary from the garden)
125g chorizo, chopped into very small pieces (or buy a pack from Waitrose :D )
Olive oil and a half-ounce knob of butter

Add a splash of olive oil to a large casserole pot or non-stick pan. Have the pot over a low flame. Melt the butter in the oil and add the finely chopped onion. Stir to coat and cook on a very low heat until soft and translucent. Don't let the onion pieces burn but a long sweating is good as this sweetens them. Peel, deseed and cube the squash. Add the squash cubes to the onion as you go, stirring in. After 10 minutes or so, add the finely sliced garlic and cook gently for a minute.

Add the rice, stir to coat with the pan juices. Sprinkle with herbs, if using. After a minute, add a good splash of hot stock. Stir. After another minute of stirring, add all the remaining hot stock and stir for a few seconds. Pop a lid on and leave it to simmer, checking every once in a while to give it a stir and make sure nothing is sticking to the pan.

When the rice is soft (I like mine slightly over cooked, rather than 'al dente'), add the chorizo and stir through to heat. (At this stage cheese and/or chopped parsley can be added.) There you go, dish up and it's ready to eat. 


22 Nov 2017

Soupe du jour

Brrrr! Ooh, I'm feeling the chill today - probably because I've not been darting around outdoors.  Instead, I've been sitting indoors trying to write this morning but thoughts of a bowl of tasty warming soup kept popping into my head. And then I thought, why not share?


9 Apr 2017

Thinking pink: Rhubarb, how do you eat yours?

Red champagne, early March


Not only am I surrounded by blossom but there's rhubarb and purple sprouting broccoli to pick too - what's not to love about spring!  The rhubarb season is now well under way here in the south-east of the UK - and hopefully where you are too.

I'm spoilt for choice this year as both my Champagne rhubarb plants have got off to a good start this year with nice long pink tasty stems.  Since the above photo was taken, both plants have produced a flower stalk - swiftly removed by me - which shows they're not entirely happy growing under the fruit trees. I'll be moving both plants next winter into a sunnier spot with good rich soil.

The Glaskin's Perpetual that I grew from seed a few years ago has been a little slower off the mark. I can live with that though because a friend lets me pick from her very vigorous rhubarb growing on one of the allotment gardens in the flats. Lovely long pink stems have been brought into my kitchen since mid-March. Amazingly, this friend doesn't even like rhubarb so never picks it; I think that's why it's so healthy, its strength has never been depleted by regular picking! Until now, of course. ;)  She doesn't know what variety it is, could be Timperley Early going by the timing.

Using an old school crate to keep marauding animals away.


At the shared allotment I counted eight rhubarb plants. Eight!! They're quite small so the team thought a little experiment might be in order. A few weeks ago, we chose the runt of the litter to see if we could force a few stems; a tall black bin was placed over the plant and weighed down with a brick. In just a few weeks the bin was removed to reveal a few pretty stems - tall, bright pink, tender and with beautiful yellow green leaves. The proper time to force rhubarb is when the crown is just beginning to show buds - I must remember that for next winter after I've mulched around the plants.  The RHS advices to stop forcing rhubarb in April and not take any more stems from the forced plant so that it has time to recover, or to not pick at all from that plant for a few years.

With all these stems to choose from, I'm have a grand old time discovering new recipes.  At first I made a compote for yogurt by chopping the stems into 3" lengths, roasting them in the oven, cooling, then chopping stem ginger into this. Simple and tasty.

Then I got a little more adventurous as my niece was coming over for supper. I whipped up meringue for a pavlova, filled with cream and laid roasted rhubarb and chopped stem ginger over the top. Tasty and visually tempting.

Pretty in pink.


The stems kept coming so I turned to Nigel Slater's Tender II - a veritable tome of inspiration for fruit growers.  Sloe Rhubarb grabbed my attention; a simple affair of roasting rhubarb stems in the oven with a bit of sugar and a good slug of sloe gin. (Plus, later, a few blueberries.) Nigel writes that sloe gin can be hard to get hold of - a very good reason to forage for sloes in the autumn and the reason my foraging has produced a well stocked cupboard.  I served the delicious results with some single cream which Mr Slater says is not strictly necessary. Although sometimes it just is.

Loving the sloe life - and pleased to find a use for my grandmother's Victorian sundae glasses


With a team get together at the allotment yesterday, a cake was needed so a traybake recipe on the Tesco website looked appealing.  It was a bit of a faff to make with lots of washing up after but the results were surprisingly very very good. (The recipe calls for walnuts; I had a bag of mixed nuts so my topping also has almonds and pistachios.)

Perhaps not just for tea time?
It was not a cake of beauty but its looks belied the tastiness within. Think sponge cake with a layer of sweetened rhubarb topped with a nutty oaty buttery flapjack topping and you're there. It was very well received at the allotment and I can heartily recommend you give this one a go.  I haven't tried, but imagine this would also be very nice warm with custard.  The recipe is on the Tesco website here: Traybake

And speaking of custard, and with the sun beating down (at least for today), my next foray into rhubarb heaven will have to be rhubarb fool, with cream of course.

How do you eat yours?


8 Aug 2016

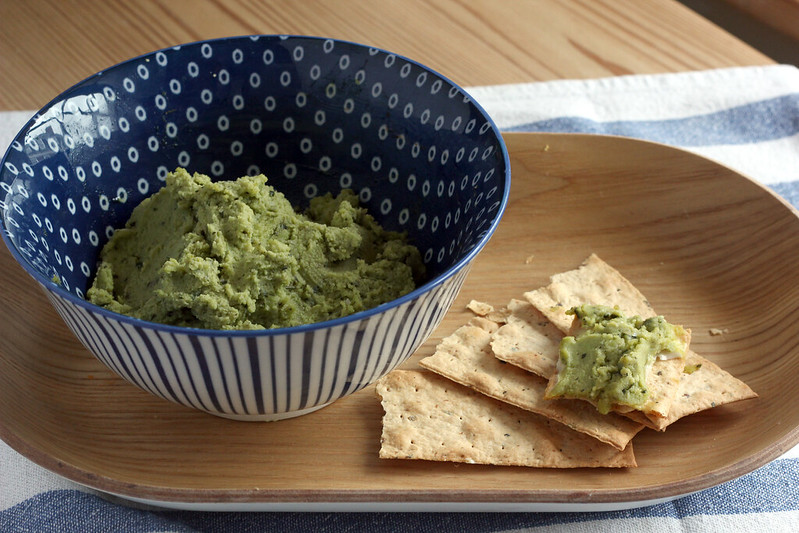
Full of beans! Want an easy recipe for Broad Bean + Mint Hummus?

Broad bean hummus

Did you know there's a whole web page dedicated to bean words?  I came across it seeking inspiration for this post title;  let's face it,  there are only so many ways you can sell a post about beans!  My favourites? (and I will try and work these into future posts) Clan of the Cave Bean, Love me Tendril and The Unbearable Lightness of Bean. No? Alright, then.

But I digress... When the pods get too big or I have too many broad beans, instead of just freezing the pods, I dig out this recipe; it's quick, easy, delicious.  If I ever get time to loaf around with a glass of wine/beer/gin (not in the same glass or even sitting) one warm balmy evening, this would be the perfect accompaniment, dipped into with some flatbreads, pitta or other dippers of choice. I mean, why buy supermarket hummus when you can easily make your own - and even better if the veg has come from your own patch! I found the results good enough to justify growing beans just for this purpose. I do love my snacks.


Have I mentioned that I did a double sowing of broad beans this year? It was an experiment on several levels: I wanted to see if I could successfully extend the broad bean harvest with two sowings, and just over two months later, I'm very pleased with the results. I have a second crop of beans.

The seeds were sown direct in mid-May, every one germinated within a couple of weeks and the plants grew strongly. There were no pests (the benefit of late sowings) and the plants quickly matched the first sowing in height. Bonus beans that feed the soil with nitrogen ready for the pot grown winter brassicas to be planted once the beans are cleared.

Above: 5 weeks after sowing. Red Epicure in first rows in front of Karmazyn at back with pods.

21 Jun 2016

Ch-ch-ch-chive talking

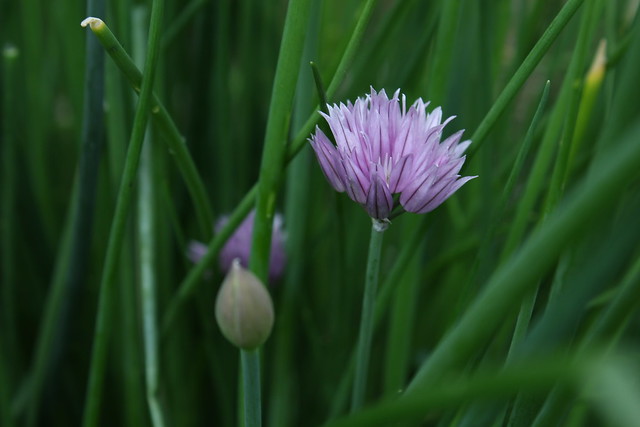
chive flower

I love that the rain has made all the flowers bloom spectacularly, especially the purple pompom flowers of chives - they look so good against the green leaves and the bees adore them.  Such is my admiration for this noble herb that I planted a clump in my 'drought' border (the hose doesn't reach there) among perennials, grasses and alpines - to be looked at, not eaten.

The other clump sits, appropriately, in my herb bed where it's currently flowering prolifically.  Every plant (not just chives) is genetically predisposed to perpetuate itself which is why it wants to flower and thus set seed. To thwart my chive into flowering for longer, I deadhead as soon as the flowers start to fade so that new flowers are coming up all through the summer to delight my bee visitors.

The petals of the flowers can be eaten and taste, rather obviously, like sweet onions.  Just pick the individual bulbils off the head and scatter over a salad - with other edible petals, if that's your thing.  For a simple lunch, I like to chop the leaves into an omelette (add cheese as well if you like) and scatter the petals over the top as a garnish - delicious, quick and more sustaining than a packet of cheese and onion crisps!

Of course, all this ch-ch-ch-chive talking is so I can introduce an intriguing dressing that I came across recently - chive flowers with honey and cider vinegar. (Thank you omnipresent Swedish furniture company, recipe below.)  It allegedly pairs well with rocket and mustardy oriental leaves like mizuna and tat soi. Alternatively, it can be used to dress a warm potato salad or pan-fried bok choy, spinach or cabbage.  Mmm, I like the sound of that! (I'm a big fan of eating my greens.)

I haven't tried it yet as I've been on a juice diet to boost my energy levels for the last eight days but am excitedly anticipating making this dressing tomorrow evening for my first salad in a week!


Honey + Chive Flower Dressing:
(Makes 75ml)
10 fresh chive flowers
1 Tbsp honey (a light honey is best, eg blossom or acacia)
2 Tbsp apple cider vinegar
2 Tbsp olive oil or cold pressed rapeseed oil
Sea salt + freshly ground black pepper

Put all ingredients in a blender and whizz to an even texture. Season with salt and pepper. Pop into a nice jug and use. Simples.


Why grow chives?  Apart from being a very useful kitchen herb, chives stimulate the appetite and, by extension, digestive juices. Useful for anyone feeling under the weather and less like eating.  Also, chives have antioxidant properties (great for zapping those free radicals) and the leaves are mildly antiseptic.

On a final note, because chives are hardy perennials they die down in winter so here's a couple of ways to have some for the colder months.

Herb butter - mix 4 tbsp of snipped chives into 100g unsalted butter.  Beat well to mix, add 1 tsp lemon juice. Freeze and use within 3 months.  Delicious on a jacket potato.

Ice cubes - but not with water! This is something I would never have thought of but read about in 'Jekka's Herb Cookbook'.  Cut chives late morning, nice green leaves only, wash and dry on kitchen paper. Snip the leaves into individual sections of the ice-cube tray; once full, put the tray into the freezer - do not add water! Freeze for 48 hours.  When that time's up, transfer to freezer bags. Get the bags ready as the cubes will defrost rapidly, take the tray from the freezer and immediately pop the chive cubes into the freezer bag and return to the freezer straight away. These portion sizes are ideal for a winter omelette.

Personally, I'm loving the idea of chive ice-cubes - hope this post has been useful to a few folk!


21 Apr 2016

Pickings and Pie


This year I have three rhubarb plants.  I don't need three, I needed one (all that my space would allow) and grew Glaskins' Perpetual from a seed several years ago.  It's huge and not very pink but I feel very proprietorial as I nurtured it into life all by myself.  Even so, when I saw Red Champagne crowns for sale a couple of years ago, of course I thought they sounded better.  Red. Champagne. Mm mmm, what's not to love?

I bought two crowns, planted them under the fruit trees as I'd read that rhubarb could tolerate a bit of shade and where (at the time) there was plenty of bare earth that needed covering and left them to it.  I thought I'd lost one plant last year as, without a hose, things get pretty dry under the trees.  The other decided to flower you may remember.  I wondered whether I'd ever get to taste any red champagne sticks but the crowns were inexpensive so it wouldn't be a huge loss. But reports of the death of my champagne rhubarb crowns were premature.


This spring, with the winter being relatively short lived and the rain lasting rather longer, I've watched rhubarb sticks from all three crowns gradually appearing over the past few weeks.  At one point I was tempted to plonk a black plastic bucket over one of them to try my hand at forcing but, as tends to happen, I didn't get round to it.  (Anyone had any success doing this? And is it worth it?)

Serendipitously, I opened an email from Simple Things mag last week to find a recipe for Rhubarb and Rosewater Tart. The timing was immaculate as I had the rhubarb in the garden and was in the mood for baking - and had some shop bought cheat's sweet shortcrust pastry in the fridge that needed using. (I'd like to say that I whipped up a batch of home-made pastry but I didn't. There.) It was delicious, whether eaten with cardamon flavoured cream or with friends and family. I made the pie in a smaller tin than suggested to share with family and used the extra filling with a dollop of jam in a small batch of Maids of Honour tarts for my goodie tin at home.

I've lost track of where we are in the gardener's calendar - I assume everyone's rhubarb is up and growing vigorously?  If you like the sound of the pie, the recipe is here and, with ready made pastry, is a doddle to make.   (The addition of rosewater is delicious but could be omitted if you have none, leaving a rhubarb and frangipane pie.)

25 Sept 2015

Three ingredients for a quick and easy warm autumn salad

I'm a big fan of warm salads and love kale for its many nutritional benefits (as well as being really tasty!) so this recipe is an autumn go-to, especially as I have most of the ingredients growing in the garden. (Pine nuts and pumpkin seeds being the exception.)


I make this Warm Carrot, Apple + Crispy Kale salad for supper regularly, adding a few freshly picked lettuce leaves from my balcony around the edge for added garden goodness. (It's also very good over basmati rice.)  It takes next to no time and - oh my goodness! - is spoon licking good.

It's so yummy that I usually scrape every last morsel from the roasting pan- but confess that I love the taste of aniseed so have tweaked the recipe to include fennel seeds (also growing in the garden and dried for winter use at the end of the year).

When I first made the dish, I added pumpkin seeds and pine nuts instead of the suggested mixed seeds (they were all I had) and I used fresh plump fennel seeds from the garden instead of dried.  I also used my whirly apple corer gadget to make rings which I sliced instead of laboriously peeling and making matchsticks out of an apple. (I love a bit of time saving, especially when hungry.)

I've also made it with extra heat by adding finely chopped red chillies and some finely chopped fresh ginger batons, and served with a poached egg on top.  I've also topped with grated cheddar, added chunks of feta cheese and sprinkled the egg with dried chillies ... although not all at once. I think this is one of those dishes that can be chopped and changed, quantities and ingredients, to suit.


Confession - there are, of course, more than just three ingredients in this recipe but I've focused on the main ones because they're available from the garden in the Autumn.

Here's my version of the recipe:

Warm carrot, apple + crispy kale salad 

(Prep 15 mins, cook 15-20 mins) (Roughly, serves 2 or 1 greedy person 😉)

Carrots - 3 med-large, peeled and cut into 6cm batons
Kale (curly or Cavolo Nero) - 4 good sized stalks
Apples - 3 medium (I grow Braeburn)3 teaspoons of fresh fennel seeds (or 1tsp dried fennel seeds)
2 Tbsp oil (olive, rapeseed, etc)
50g mixed seeds or nuts (I use 25g pumpkin seeds + 25g pine nuts)
A good drizzle of olive oil
Tamari soy sauce (optional or use ordinary soy sauce)
Seasoning (salt + pepper)


1.  Preheat oven to 180C, gas 4. Place carrots in a bowl and toss with the rapeseed oil and fennel seeds to coat.  Spread them out on a large roasting tin and roast for 5 minutes, then add the mixed seeds (or whatever you're using) and roast for a further 2-3 minutes until toasted and golden.
2. Add the chopped kale leaves (stalks discarded), toss with the carrots and seeds.  I drizzled more olive oil over the kale at this stage plus a drizzle of Tamari soy sauce and a grinding of black pepper.  Roast for a further 6 minutes until beginning to crisp.
3. Add the sliced apple rings, toss with other ingredients and pop back in the oven for two minutes.
4. Remove from oven, dish up and eat - on it's own, with a salad or as a side for a bigger meal. 


Do you like the sound of this recipe?  (Download the pdf here.)
Have you got any go-to favourites for your autumn garden produce? Share, please! 


18 Jul 2015

Biscuits, bees and lavender

A cookie jar rarely stays full for long in my kitchen; biscuits, as we like to call them in the UK, are a lovely thing to make in your kitchen at home. They don't take long to make, especially (or even) if you have children to help. This recipe uses fresh lavender from the garden but this could be replaced with shop bought lavender buds (from the home baking aisle) - or left out altogether and have vanilla or lemon zest added instead. I hope you enjoy them as much as I do!


Shall we just pretend for a moment that the grey skies of the past week haven't happened?  It's not been very summery over the last week although, once outdoors, I've been surprised how humid it feels despite grey skies and drizzling rain. But enough of all that.  Let's pretend that it's a glorious warm and mellow summer's day - a perfect day for relaxing in the garden with some iced lemonade and homemade biscuits, listening to the bees busily collecting nectar from the nearby lavender bushes. Hmmm.  Biscuits + Lavender. Now there's a thought.

Lavender is definitely the top summer plant in my garden for attracting bees, the bushes are in constant motion with bees landing and taking off again from the flowers.  But they're not just a pretty face - there's a lot more that lavender is good for.

  • The dried leaves and flowers can be mixed with rice to make aromatic microwave-able handwarmers; 
  • fabric pouches filled with lavender flowers can scent clothes or be tucked under a pillow for good night's sleep; 
  • the oil is soothing, calming and healing; 
  • lavender spikes make lovely cut flowers (cut when half to one-third of the flowers are open and cut above a pair of leaves) and, of course, 
  • the flowers are edible.


I discovered this recipe while skimming through a Mary Berry book due for return to the library: Lavender biscuits, how intriguing.  And there's something so dependable about Mary Berry that I instinctively trust her recipes.  This recipe calls for 2 tablespoons of fresh lavender flowers and/or leaves.  Ever one to expand my repertoire of what to do with edible flowers, I decided to make a batch for teatime (and other moments when a snack is required).

First task was to gather flowers and photos. This part of making the biccies took a while; I'm easily distracted from the task in hand when watching bees and hoverflies and came back with many photos, mostly of blurred bees.


Back indoors, I'd left the butter to soften and already weighed out the other ingredients so it was just a case of stripping the stems, finely chopping the flowers and putting it all together which took hardly any time at all.  Don't waste the stems - when used as skewers for grilling meats they'll add subtle flavour and can also be used to gently fragrance the dying embers of the barbecue or winter fire.

The biscuits should be baked on two trays but, instead, I used one tray twice.  Just as well, as I thought the first batch (lavender only) tasted a bit 'soapy'. I added a grating of lemon zest to the second batch which made a much better and very tasty biscuit.  Of course, that could just be me.  I recommend you try them.  Even without lavender, the biscuits are a lovely open 'shortbread' texture and keep well in an airtight jar.  Oh, and don't skimp on the Demerara sugar - it gives a lovely sweet crunch to the biscuit.

Recipe here on my Google drive - download for printing, if you wish.

31 Jul 2014

Busting a Glut ...

I'm seeing a lot of courgette gluts being mentioned on gardening blogs at the moment. Trust me, I've been there but this year have neatly side-stepped that trap by having slugs eat my spare courgette plant and only having one to harvest.  I'm not counting my Ikea courgette growing experiment, more of which in another post. (Which means I'm posting backwards, I think.)


When faced with a daily deluge of courgettes, it's easy to begin to feel slightly overwhelmed at the challenge of appreciating all this bounty. I have a number of recipe books in my kitchen to turn to as well as coming across some nice glut-busting ideas on the internet and in magazines.  I thought a round up might be in order.

In  my own kitchen I turn to Dr Hessayon's Garden to Kitchen Expert, Sarah Raven books, Hugh Fearnley-Whittingstall's Veg Every Day and Nigel Slater's Tender Vol One (the veg one). Last night, I cooked the ratatouille (minus the aubergine but with lots of courgettes- fruit, baby leaves and stems) from Kitchen Garden Experts, teamed it with a Mary Berry beef mince sauce and sandwiched it all together with lasagne sheets. Delicious.

On the internet, I thought the following all sounded worth a shot:

From Faith Wallinger writing for The Atlantic:
  • Chop the male and female flowers and sauté in olive oil with finely chopped garlic for a pasta sauce or risotto flavouring. 
  • A Sicilian dish: Stew the tender young leaves with garlic, courgette chunks and courgette flowers. (I'm thinking some tomatoes would be nice with this.)
  • Courgette carpaccio recipe here.  (Thinly sliced raw, drizzled with olive oil, topped with parmesan.)
  • Stuff the flowers with ricotta, layer into a non-stick pan, drizzle with olive oil, cover with a lid and steam/fry over a medium heat for 5 minutes. The steam from the ricotta will cook the flowers. Season and serve.

From Veg Box: Lemon Butter Courgettes.  Plot to plate in less than 15 minutes. Butter, lemon, olive oil, courgette. Simples.

From the BBC Good Food website:
A courgette and caraway cake with apple flavoured cream cheese frosting and caramelised oat topping. Now, be honest, if you saw this on a stand in a café, you'd want a slice wouldn't you? I know I would! This cake is from chef Valentine Warner; It looks, and probably is, delicious. I make a fantastic pork and barley stew by this same chef; on that criteria, I'd say he knows how to make really tasty stuff.

Courgette and caraway cake. Image courtesy of BBC Good Food website.
Roasted vegetables (including courgettes or whatever else you may have lurking) from that queen of the kitchen, Mary Berry. Actually, this is a great end of week meal to throw over couscous or rice and to use up all the veg in the fridge before a Saturday shop.

Sweet stuffed courgette flowers.  Initially this looks like a right faff but, oh my goodness, I bet these are beyond yummy! A recipe by John Torode (the grumpy one from Masterchef), wherein he stuffs courgette flowers with a crème pâtissière, coats with a light batter, fries them, then rolls them in cinnamon sugar. A bit like 'healthy' custard doughnuts, eh?  Recipe also includes a boozy raspberry syrup - I'm not sure these fritters would last that long in my kitchen.

Sauté potato and courgette.  Quick and a delicious side, or a meal in itself with an egg on top, but note this recipe serves only one. Personally, and I don't know what this says about me, I could easily eat three times this. You'll need potato, courgette, garlic, oil, a few herbs, seasoning … and a fork. This is my kind of food.

Citrus and courgette ribbon salad.  Garden ingredients are salad onions, courgettes, parsley plus lemon, walnuts and olive oil. Add a glass of chilled Prosecco, some warm evening sunshine, a table in the garden and who needs to go on holiday?

Courgette pancakes with spiced greek yogurt.  Goodness, is there no end to the versatility of this vegetable! This is lovely finger food - roll them up and dip away! I guess any children might have to get over not finding chocolate and banana in their pancakes but would soon get over it if a variety of dips and toppings were on offer.

There's heaps more to inspire on the BBC website.

And if the blighters do start to get the better of you, there's always Hugh Fearnley-Whittingstall's River Cottage Glutney, a fantastic way to preserve and eke out those delicious summer flavours.  That link also has Slow-cooked courgettes on toast and a courgette moussaka. Unsurprisingly, my thoughts are veering towards snacking on courgettes and toast for lunch tomorrow.

There, that should keep us all going. Actually, I'm beginning to wish I'd grown a couple more plants… I could do with a glut after reading all those recipes.


Edited to add:  Sue at Green Lane Allotments has a page of delicious courgette recipes that can be found on her blog here

27 Sept 2012

Grab n Go breakfast!

The sun is once again shining here today which always lifts both mood and motivation.  Just before heading down to the garden, and thinking about the early start to college tomorrow, I've just made a batch of these oat and honey pancakes. I'm not ready to eat breakfast for at least an hour after waking up/cup of tea which posed a problem last Friday as I have to leave home by 7.30 a.m. on college days in order to avoid heavy traffic.  This means that I have to be on the road at the same time as I'm ready for my breakfast. (I suppose I could always get up at 6 a.m. but where's the fun in that when it's cold and dark?)

Oaty pancakes

I read the recipe for these pancakes on the Lavender and Lovage blog a few days ago and immediately thought that a batch of these, warmed through before leaving, sandwiched together with honey and eaten with fruit, might be an ideal portable breakfast.  I've just made a batch (10 pancakes) and can report that they're easily made and delicious! Because I'm currently watching my weight (so I really shouldn't be eating these at all!), I made these with skimmed milk and used a spray oil in the pan rather than butter; both worked well.

The batter is mixed with oats (for energy)and Manuka honey (immune system booster). Eaten plain, there's a hint of sweetness from the Manuka honey; eaten with crème fraîche or Greek yogurt and fresh fruit, they're both tasty and filling.  With more time to spare, I bet they'd be just awesome with bacon and a poached egg (and the latest gardening mag to read).

The test will be how well these re-heat tomorrow morning (even I can't make pancakes at 6.30 a.m.). Undoubtedly they'll be better freshly made but needs must.  Hopefully this post will strike a chord with others having to dash off first thing in the morning, not least my teenager.  My thanks to Karen for sharing her recipes with the internet!

Here's the link (scroll to bottom of page for printable recipe):

Karen's Fluffy Porridge Pancakes

Now, at last, for some gardening!

13 Aug 2012

Lovely Lemon Curd

Lemon curd jars

Lemon curd to me is as Hunny to Winnie-the-Pooh - once there is a jar in the house, one little taste just won't do.  When the Veg Patch was started four years ago, a group of us thought that some lemon trees would be a novelty for the children. Despite the advert's claims, they don't fruit in this country (although, perhaps in a greenhouse?) but the leaves have a lovely citrus scent when crushed. The trees duly arrived, folded into their boxes. Not an auspicious start and the ensuing winters fairly well did them in.  There's one tree left which I brought up to my balcony last winter for shelter. It's now on the stairwell, by a window which acts as a greenhouse; because I pass it every day, it's watered and tended regularly and has slowly recovered. During the last week, my efforts started to pay off as it produced lots of fresh new leaves.  A couple of days ago, I noticed tiny flower buds!  Ah, exciting times.

Lemon flowers

I doubt these will ever make useable lemons but refocussing on the lemon tree reminded me that I hadn't made any lemon curd for a while.  All you need are lemons, eggs, sugar and butter - and a couple of jars. I always have these ingredients to hand so, an hour later, I was tucking into lashings of lemon curd atop a hunk of freshly baked bread... which, of course, was photographed after one bite!

Having honed my recipe from one my Mum makes and Heston Blumenthal's filling for a lemon tart, I've just realised it's very similar to Delia Smith's recipe but without the extra cornflour she uses.  I feel that the curd should set on its own without extra thickeners and I imagine the cornflour would make it unpleasantly thick, like a lemon meringue pie filling.  So here's my combination of the two, for folk who like a good sharp/sweet bite to their lemon curd and fancy making some at home. It's really very easy and much nicer than shop-bought and without the preservatives or thickening agents.


Lemon Curd

6 oz Caster Sugar, 3 medium eggs,
2 unwaxed lemons (yielding about 100 ml juice), 4 oz unsalted butter
3 small or 2 large clean jars.

First wash your jars in hot, soapy water (do I really need to say that?) and put the glass jars upside down on a shelf in the oven at 150C while you make the curd.  Put the lids in the bottom of a saucepan, cover with a couple of inches of water, bring to the boil then turn down to a simmer. This is the simmering water which will be under your cooking lemon curd; may as well use it for sterilising the jar lids. (Take the lids out, with tongs or a fork, after about 5 minutes, by which time their rattling will be very annoying.)

Weigh out the sugar, chop the butter into chunks, beat the eggs well, finely zest the rind of the lemons and squeeze the juice. Add all ingredients together to a heatproof bowl (I use Pyrex glass) and place the bowl over the simmering water. (It should sit above the water, not touching.) Stir gently for about 15 to 20 minutes as it gradually thickens. (If you don't stir, your curd will be lumpy like scrambled eggs and won't set.)

Take the jars out of the oven and get a clean bowl and plastic sieve ready. Pour the curd into the sieve and, with the bottom of a ladle or a wooden spoon, gently stir the curd through the sieve to the bowl below.  This removes any cooked egg whites and pieces of zest (I like my curd smooth).

Ladle the curd into the jars. Put a sprig of lavender (optional) on the surface of the jars being stored and quickly put the lid on while the curd is still hot. As it cools, the air in the jar will contract, giving a nice tight seal to the jar.


Why the lavender?  I've read that it's commonplace in the South of France to place a sprig of lavender on home-made preserves where its anti-bacterial properties will prevent any mould forming on the surface. (Thank you Karen, writing for Garlic and Sapphire blog.) Lemon curd won't be around long enough in my house for this to happen, but it looks pretty - especially if you're giving the jars as a gift.

Make sure that you've put some aside for yourself ...

Bread and curd


Related Posts Plugin for WordPress, Blogger...